[출처]
•
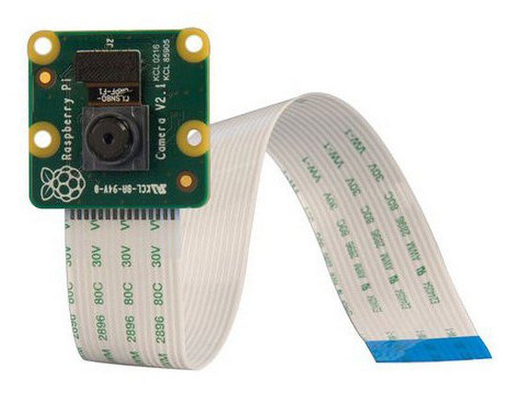
일단 잭슨나노와 카메라 모듈에 연결하는 걸 먼저 검토해보았다.
# MIT License
# Copyright (c) 2019 JetsonHacks
# See license
# Using a CSI camera (such as the Raspberry Pi Version 2) connected to a
# NVIDIA Jetson Nano Developer Kit using OpenCV
# Drivers for the camera and OpenCV are included in the base image
import cv2
# gstreamer_pipeline returns a GStreamer pipeline for capturing from the CSI camera
# Defaults to 1280x720 @ 60fps
# Flip the image by setting the flip_method (most common values: 0 and 2)
# display_width and display_height determine the size of the window on the screen
def gstreamer_pipeline(
capture_width=1280,
capture_height=720,
display_width=1280,
display_height=720,
framerate=60,
flip_method=0,
):
return (
"nvarguscamerasrc ! "
"video/x-raw(memory:NVMM), "
"width=(int)%d, height=(int)%d, "
"format=(string)NV12, framerate=(fraction)%d/1 ! "
"nvvidconv flip-method=%d ! "
"video/x-raw, width=(int)%d, height=(int)%d, format=(string)BGRx ! "
"videoconvert ! "
"video/x-raw, format=(string)BGR ! appsink"
% (
capture_width,
capture_height,
framerate,
flip_method,
display_width,
display_height,
)
)
def show_camera():
# To flip the image, modify the flip_method parameter (0 and 2 are the most common)
print(gstreamer_pipeline(flip_method=0))
cap = cv2.VideoCapture(gstreamer_pipeline(flip_method=0), cv2.CAP_GSTREAMER)
if cap.isOpened():
window_handle = cv2.namedWindow("CSI Camera", cv2.WINDOW_AUTOSIZE)
# Window
while cv2.getWindowProperty("CSI Camera", 0) >= 0:
ret_val, img = cap.read()
cv2.imshow("CSI Camera", img)
# This also acts as
keyCode = cv2.waitKey(30) & 0xFF
# Stop the program on the ESC key
if keyCode == 27:
break
cap.release()
cv2.destroyAllWindows()
else:
print("Unable to open camera")
if __name__ == "__main__":
show_camera()
Python
복사
•
코드를 보니 cv2 있는걸 보니깐 먼저 opencv를 설치해줘야 할 것 같다.
pip install opencv-python
•
상기 명령어를 입력하니 아래의 오류가 나왔다.
Collecting opencv-python
Downloading https://files.pythonhosted.org/packages/01/9b/be08992293fb21faf35ab98e06924d7407fcfca89d89c5de65442631556a/opencv-python-4.5.3.56.tar.gz (89.2MB)
100% |████████████████████████████████| 89.2MB 14kB/s
Complete output from command python setup.py egg_info:
Traceback (most recent call last):
File "<string>", line 1, in <module>
File "/tmp/pip-build-x37k9er9/opencv-python/setup.py", line 10, in <module>
import skbuild
ModuleNotFoundError: No module named 'skbuild'
----------------------------------------
Command "python setup.py egg_info" failed with error code 1 in /tmp/pip-build-x37k9er9/opencv-python/
Python
복사
•
오류를 해결하기위에 아래의 사이트에 있는 내용을 참고해보았다.


python -m pip install --upgrade pip
pip install scikit-build
pip install cmake
Python
복사
•
상기 명령어로도 해결이 안되니 아래의 명령어로 해결했다.
pip3 install --upgrade pip
pip3 install opencv-python
Python
복사
•
pip3로 설치해서 상기의 코드를 실행시키기 위해서는 아래와 같은 python3 명령어로 실행시켜야 했다.
python3 main.py
Python
복사
연구 시작
•
일단 나는 잭슨 자비어에 usb로 웹켐을 달았다. (logitech 꺼 좋은거)
•
그런데 이게 정상적으로 잘 인식하고 있는지 문득 궁금해서 명령어를 알아보았다.
•
usb로 웹켐을 정상적을 연결하면 video 드라이버가 올라오는지를 확인할 수 있는데 확인 방법은 ls /dev/video* 명령어를 입력하는 방법이다.
•
상기 방법은 최상단 폴더안에 dev 폴더 안에 있는 video로 시작한 드라이버가 떠있는지를 체크하는 명령어이다. 정상적으로 연결 되었으면 드라이버가 없을것이며 있다면 있다고 표시가 될 것이다.
•
그리고 v4l2-ctl 명령어를 실행해서 fps 옵션을 체킹할 수 있다.
•
그런데 초창기에 세팅에는 이 작업이 없을수 있으니 아래의 명령어를 입력해서 라이브러리를 설치해줘야한다.
•
sudo apt-get install v4l-utils
[출처]


•
v4l2 명령어 관련되어서 더 자세하게 알고싶으면 아래의 링크로 들어가서 참고하도록 하자(필자는 데이터 수집할때 카메라 변인통제를 하기위해서 사용하였음)


끝
안녕하세요
•
한국전자기술연구원 김영광입니다.
•
관련 기술 문의와 R&D 공동 연구 사업 관련 문의는 “glory@keti.re.kr”로 연락 부탁드립니다.
Hello
•
I'm Yeonggwang Kim from the Korea Electronics Research Institute.
•
For technical and business inquiries, please contact me at “glory@keti.re.kr”